You can use free software to create words using my alphabet photography letter images! Here's how ...
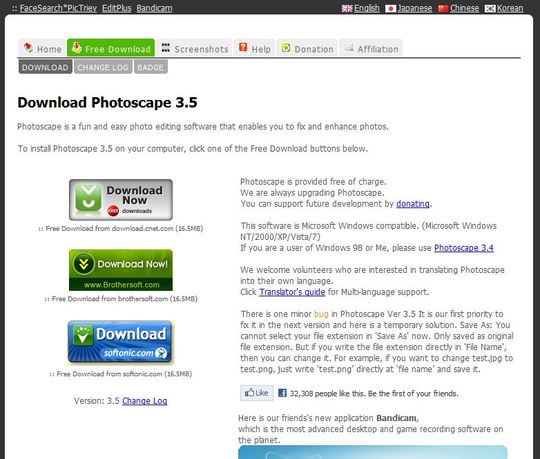
I've had many requests to add a tutorial for creating word projects that I decided to do just that. :-) And for those of you who aren't familiar with photo editing software, don't worry. I found one that is so easy to use - plus it's free. It's called Photoscape (PC compatible) and you can download it here: http://www.photoscape.org/ps/main/download.php
You can also try www.Picnik.com (also free) - it is both Mac and PC compatible.
You can choose to download the program via 3 different programs. I used the "cnet" one just because I was already familiar with the name and I trusted it. But it's up to you.
After you have downloaded the software ...
When the download is complete, open up the program and select the "Combine" feature. It's at the "3:00" position on their circular menu. :-)
You'll see this screen now ------------------------------------> |
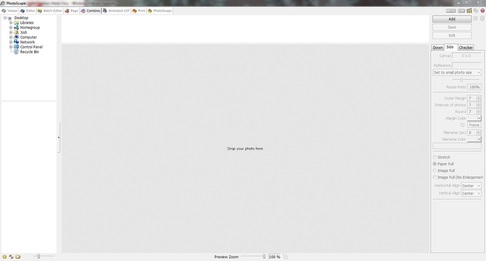 |
In the upper left-hand area, follow the path to your images ...
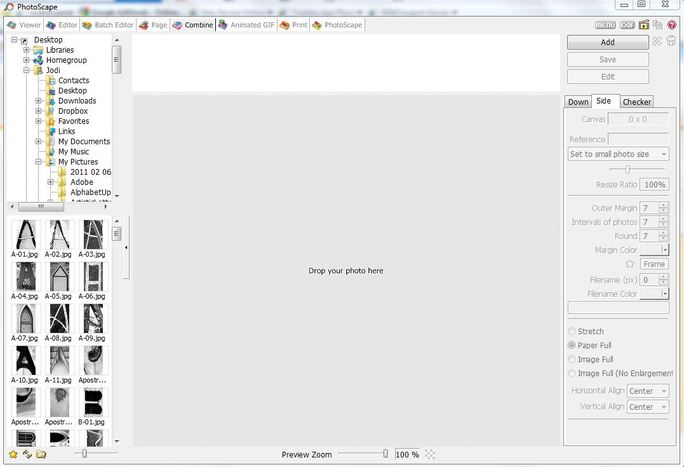
I had to follow the path to my "Letters Black and White" folder where I have my images.
You'll then see all the letter images along the left-hand side.
Next - just drag and drop your letter images to spell your word ...
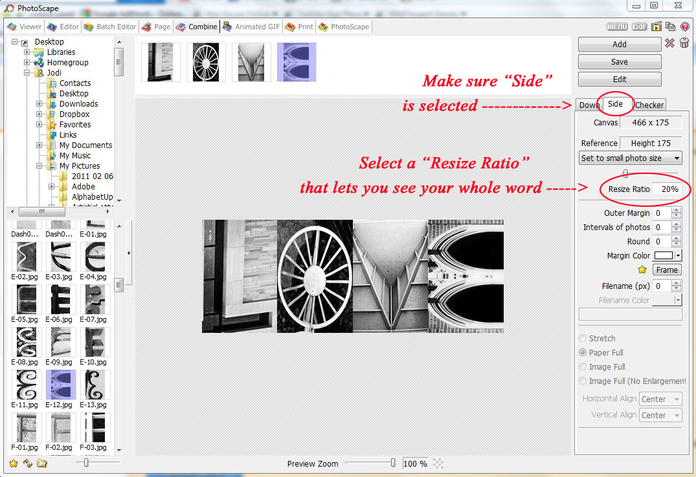
... it's that easy! Photoscape automatically aligns them in the order you drag them to the work area and makes them all the same size.
Now get really fancy ;-) ...
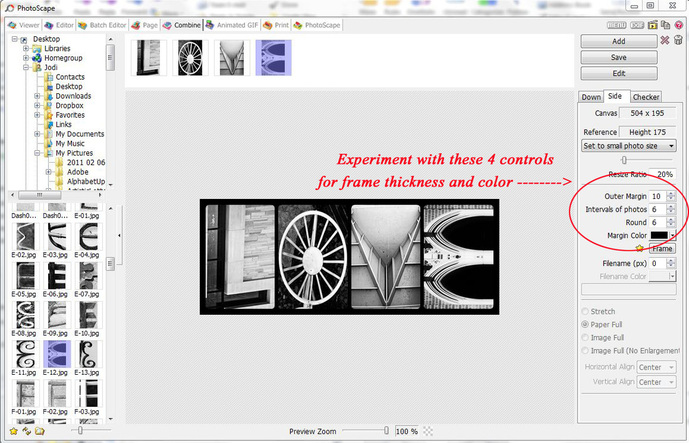
Use the circled area to create borders around either your whole word and even in between each letter.
You can even change the "Margin Color" to make your frame different colors.
Get ready to save ...
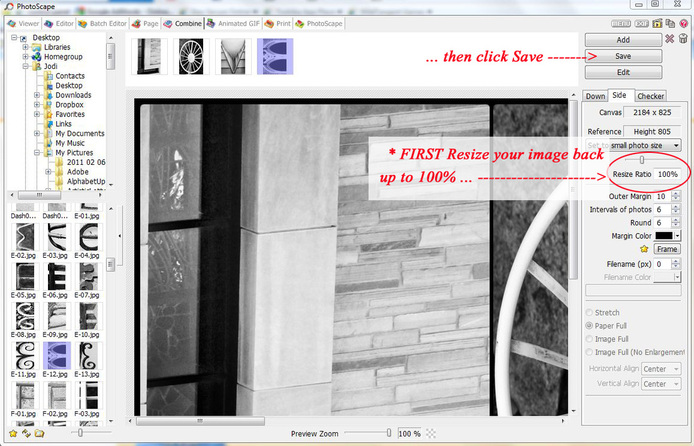
When you are happy with your design, FIRST Resize it back up to 100% - then click Save.
JPEG is probably the most common file, but you can save as any of the selections given.
Now you have your word in one image that you can print!
... OR keep following the tutorial if you want to add your word to a digital matte ...
Open your photo editing software ...
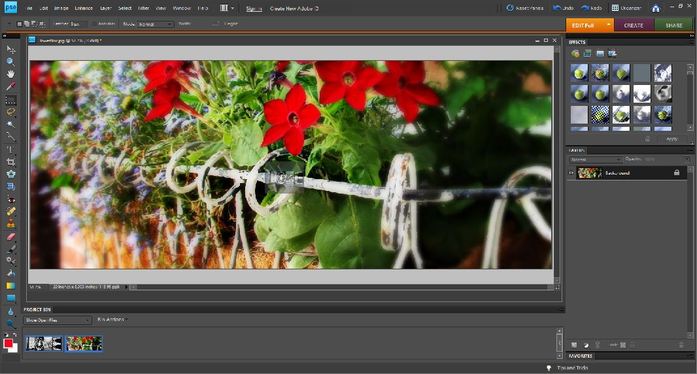
Have your matte image (I used my "Flower Box" matt for this example, but you can use any image you want) in your work space and then drag your word onto the matte. I am using Photoshop Elements 8 on Windows, but the basic steps should be fairly similar with other programs.
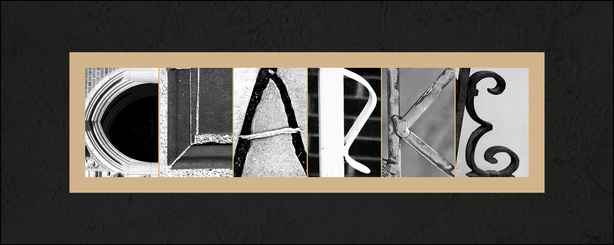
NOTE: For this version of LOVE I used "Outer Margin" of 50, left the other 2 controls at 6, and changed the Margin Color to white.
NOTE: For this version of LOVE I used "Outer Margin" of 50, left the other 2 controls at 6, and changed the Margin Color to white.
Resize your word ...
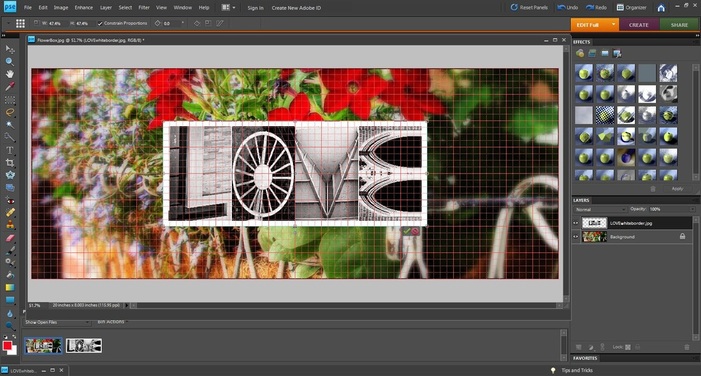
Your word will probably appear very large. You will need to resize it and the center it. I have activated my "grid" feature to help me with centering.
(I then removed the grid feature when I was happy with the placement)
You're almost finished ...

You can not only resize your word image to make it smaller or larger, but you can stretch it to make the word longer and squash it to make it shorter. Just experiment with the shape of the image until you have happy with it.
Then save your image as a JPEG and it's ready for printing!
 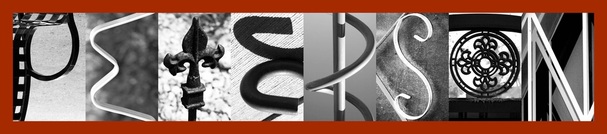 |
Just 1 click ...
... makes a huge difference. Click the "Down" tab instead of the "Side" tab and you've created a whole new look! |